
Add Border to Image
Add Border to Image in a few clicks with this free online tool. You upload one picture, set the border width and color, and get back the same picture with a frame around it. The tool adds the border around your picture, so the picture itself is not covered or cut.
- Results vary with the picture. Our measurements were made on generated test pictures, not real photos.
- The largest border is 200 px on each side.
- Anonymous use needs a human check (Cloudflare Turnstile). Signed-in users skip it and use credits.
Drop an image here
PNG, JPG, WebP, AVIF, GIF, BMP or TIFF, up to 5 MB
Same keeps the file type (a GIF stays a GIF; BMP and TIFF are saved as PNG, AVIF as WebP).
Complete the human check to enable the button.
Result
Your image will appear here.
The free web tool takes images up to 5 MB, 30 per day. Signed in, the limit is 10 MB. The image keeps its pixel size unless you choose Make smaller.
Retention: web-tool results are deleted after 10 minutes and no history is kept. API results are kept 1 day on the free plan and 7 days on Starter and Pro (30 days on Business and Scale).
No account needed
30 images per day for free, no watermark.
Only your edit is applied
The rest of the picture is left as it is. Camera and location tags (EXIF, GPS) are not written to the result.
Deleted automatically
Web tool results are removed after 10 minutes.
Privacy: what you submit is used only to make this file. The working copy is deleted when the job ends, the result after 10 minutes. See the privacy policy.
Do this from your code
The same edit as an API request: send the image bytes, then poll the job. It needs an API key; a free account can create one.
curl -X POST "https://api.aiipworld.com/v1/image-jobs?op=image_edit&action=border&width=20" \
  -H "Authorization: Bearer $AIIPWORLD_API_KEY" \
  -H "Content-Type: image/png" \
  --data-binary @input.png

# returns {"job_id": "...", "status": "queued", "credits_reserved": 1}; then poll:
curl https://api.aiipworld.com/v1/jobs/JOB_ID -H "Authorization: Bearer $AIIPWORLD_API_KEY"
Batches
The web tool handles 1 image at a time. The API takes one request per image, so you can script as many as your plan allows.
Retention
Web-tool results are kept 10 minutes; free API results 1 day; Starter and Pro results 7 days; Business and Scale 30 days. The web tool allows 10 conversions per minute and 50 per day per visitor.
In one sentence
A free online tool that adds a border of 1 to 200 px around a picture, in a color or transparent, on all four sides or only some, and saves it as PNG, JPEG, WebP or GIF.
Key facts
- Input: one picture up to 5 MB in the free tool and 10 MB when signed in, and up to 16 MP (4096 x 4096); animated GIF and WebP get the border on every frame within the animation limits.
- Settings: the width (1 to 200 px), the color or a transparent border, the sides, save as the same type, PNG, JPEG, WebP or GIF, and quality for JPEG and WebP.
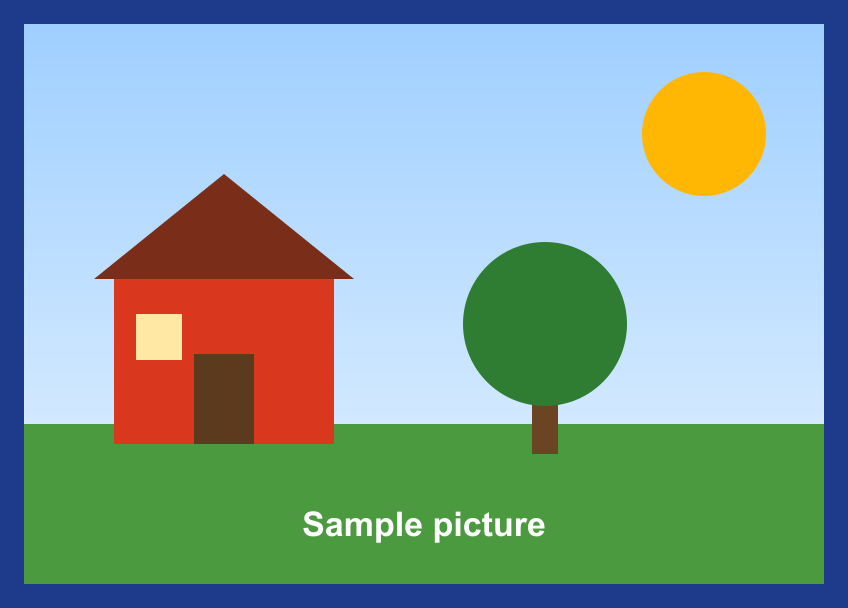
- The border is added around the picture and the canvas grows; in our test an 800 x 560 px picture with a 24 px border became 848 x 608 px and no pixel of the picture was covered.
- The upload is deleted when the job ends and the result after 10 minutes; signed-in users pay 1 credit per file plus 1 credit for each started 5 MB of result beyond the first 5 MB and, for an animation, 1 credit for each started 10 MP of frames beyond the first 10 MP.
- Free without an account: up to 10 conversions per minute and 50 per day per visitor, no watermark. Signed in, each render costs 1 credit (100 free credits every month).
- Files are deleted automatically: 10 minutes after conversion without an account, 1 day with a free account.
- Developers can run the same job with POST https://api.aiipworld.com/v1/image-jobs?op=image_edit (the image as the request body, settings in the query string) and an API key (see the API docs page).
How it works
- Upload one picture. Use a file you have the right to use.
- Set "Border width in px". The page starts at 20.
- Pick a "Border color", or tick "Transparent border".
- Tick the sides you want in "Sides". All four are on by default.
- Click "Add border" and check the result panel before you download.
Example output
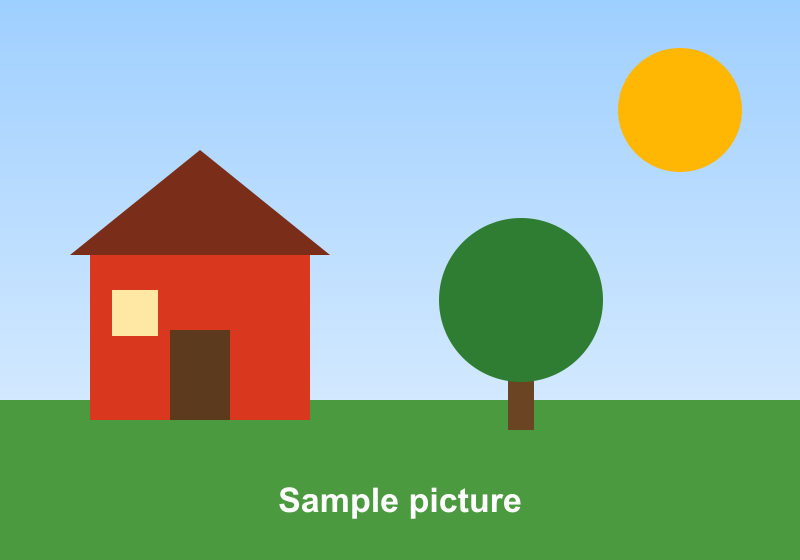
Original PNG, 800 x 560 px, 24 KB
With a 24 px border: PNG, 848 x 608 px, 21 KB
How to Add Border to Image Files
To add border to photo files or any other supported picture, upload it, set the border settings, and click "Add border". The page shows the size the picture will have before the upload, so you can check the change first. The result panel then shows the picture with the border, what was added, the size, and the credits used.
The tool handles one picture at a time. Your file is sent to our server, where the border is added and the result is made. You can put a border on a picture of any supported type.
Border Width and Color for an Image Border
Set "Border width in px" to a whole number from 1 to 200. The width is the same on every chosen side. Different widths per side are not offered.
The default color is black, #000000. Use the color picker to choose another color, for example white to add a border to a picture as a frame. A 24 px border in #1e3a8a on an 800 x 560 px test illustration gave a border in that exact color on all sides.
Choose Which Sides Get a Border
Use the Top, Right, Bottom and Left checkboxes to pick the sides. All four are on by default. Turn off the sides you do not want.
For example, a 10 px black border on the top and bottom only changed an 800 x 560 px test picture to 800 x 580 px. The width and height grew only on the sides you chose.
The Picture Gets Bigger, It Is Not Covered
The border is added around the picture. The canvas grows by the border width on every chosen side, and the picture keeps its original pixels. In our test, an 800 x 560 px PNG with a 24 px border became 848 x 608 px, and a pixel of the picture was found unchanged 24 px further in each direction.
Because the canvas grows, the file can also grow. Check the size shown in the result panel.
Transparent Border
Tick "Transparent border" to add empty space around the picture instead of a color. A 20 px transparent border on an 800 x 560 px test picture gave an 840 x 600 px PNG with a see-through frame.
PNG and WebP keep the transparent border. A JPEG cannot hold transparency. With "Same as the original" and a JPEG input, the result is saved as PNG and the result panel says so. If you choose JPEG, the border is filled with the background color, which is white unless you change it. GIF transparency is on or off only, so the edges can look jagged.
Choose the File Format
"Save as" offers Same as the original, PNG, JPEG, WebP or GIF. Same as the original is the default and keeps the type of most files. A GIF stays a GIF, BMP and TIFF are saved as PNG, and AVIF is saved as WebP.
PNG keeps every pixel. JPEG and WebP are lossy. Use the Quality slider for JPEG and WebP. The default quality is 90.
Adding a Border to an Animated GIF or WebP
An animated GIF or WebP keeps its animation when the output is GIF or WebP and the animation checkbox is on, which is the default. Every frame gets the border, and the frame delays and loop count are kept. In our test, a 24 frame 320 x 240 px GIF with an 8 px black border became a 24 frame 336 x 256 px GIF.
With PNG or JPEG output, or with the checkbox off, only the first frame is used. The canvas of an animation counts with its bigger size after the border is added.
Limits: Size and Pixels
You can upload up to 5 MB without an account, and up to 10 MB when you are signed in. Each picture can have up to 16 MP (4096 x 4096) (width x height), checked before the picture is opened. Without an account you can run 30 jobs per day per visitor.
The result can be at most 40 MP, and WebP results are limited to 16,383 px on a side. A result over these limits is refused, not shrunk. A large photo saved as PNG can pass 20 MB. In that case, use JPEG or WebP. The job then fails with output_limit, and the credits are refunded.
What to Check in the Result
Look at the result panel before you download. It shows the size of the result, what was added, and any notes from the engine. Check that the border width and color are what you chose, and that the sides you picked are the only ones with a border.
Results vary with the picture. Look at the edges of the result in a large view, especially if you saved as GIF or used a transparent border.
Add Border to Image From Code
Send a POST request to https://api.aiipworld.com/v1/image-jobs?op=image_edit&action=border with the raw picture bytes as the body, not JSON or multipart. Set Content-Type to image/png, image/jpeg, image/webp, image/gif, image/avif, image/bmp or image/tiff. Pass the settings in the query string, and send your API key as Authorization: Bearer or as x-api-key.
The response is 202 with a job_id. Poll GET /v1/jobs/:id, then use the download_url, which is a short-lived signed link. The page shows a ready cURL, Node and Python example built from the settings you chose. Errors include 400 invalid_params, 400 unsupported_image, 413 file_too_large, 402 insufficient_credits and 429 rate limited. A failed job can return invalid_input, image_too_large, animation_too_large, output_limit or timeout.
Privacy: What Happens to Your Picture
Your uploaded file is used only to make the result. The working copy is deleted as soon as the job ends, whether it succeeds or fails. The result is deleted after 10 minutes in the free web tool, and no history is kept. Download links are short-lived.
Camera and location tags are not written to the result. You must have the right to use what you upload, as set out in our Acceptable Use Policy.
Questions
Can I add a border to an image for free?
Yes, you can add a border to an image for free without an account, up to 30 jobs per day per visitor. Anonymous use needs a human check (Cloudflare Turnstile).
How do I add a white border to a photo?
Upload the photo, set the border width, and change the border color to white (#ffffff), because the default is black. Then click "Add border" and check the result panel.
How wide can the border be?
The border can be from 1 to 200 px on each side, as a whole number. The page starts at 20 px.
Does the border cover part of my picture?
No. The border is added around the picture, and the canvas grows by the border width on each chosen side. In our test, the picture itself was not covered.
Can I add a border on only one side?
Yes. Untick the sides you do not want in the Sides checkboxes. Top, Right, Bottom and Left are all on by default.
Can I add a transparent border?
Yes, tick "Transparent border". PNG and WebP keep it. A JPEG input saved as "Same as the original" becomes a PNG, and the result panel says so.
Can I use a different color on each side?
No. One border color is used on all chosen sides. Different colors per side are not offered.
Does adding a border change the picture size?
Yes. The canvas gets bigger by the border width on every chosen side. For example, an 800 x 560 px picture with a 24 px border on all sides became 848 x 608 px in our test. Results vary with the picture.
Can I add a border to an animated GIF?
Yes. Every frame gets the border, and the animation is kept when the output is GIF or WebP and the animation checkbox is on. With PNG or JPEG output, only the first frame is used.
Can I add a border to an image in my own code?
Yes. Use the image_edit operation with action=border on the API. The page shows a ready cURL, Node and Python example for the settings you choose.
Need this in your app or in bulk?
This tool runs on the same platform as the API, so the same image is one HTTP request from your code. A free account includes 100 credits a month.